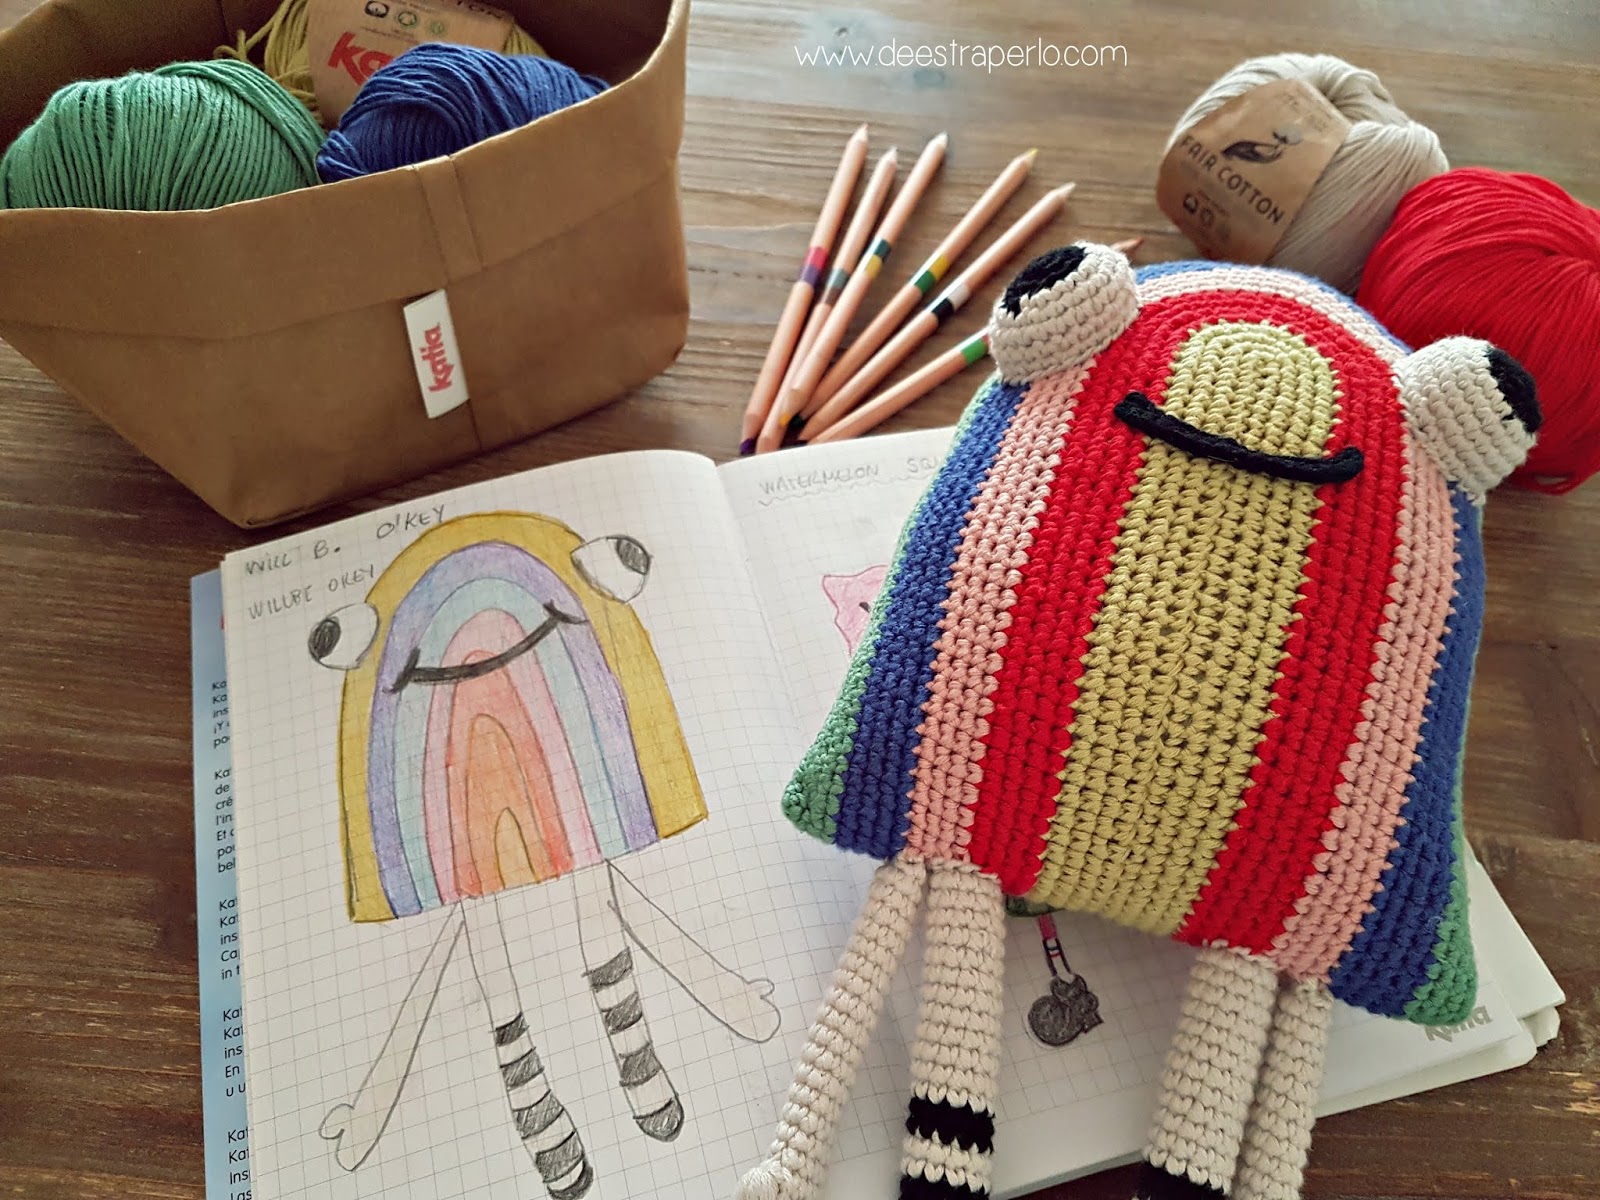
As soon as I knew about the initiatives #andratuttobene and #desdemiventana (consisting on hanging banners from your windows and balconies, with rainbows painted by the little ones) I knew I had to make a rainbow amigurumi. Actually I needed it. Come on, rainbows, colours and positive vibes? Oh please, baby.<
En cuanto supe de las iniciativas #andratuttobene y #desdemiventana consistentes en colgar de los balcones pancartas con arcoiris pintadas por niños, tuve claro que quería hacer un amigurumi de un arcoiris. Más que querer era casi una necesidad. ¿Arcoiris, colorines, sentimientos positivos y mensajes optimistas? Oh si, baby.
It started as a kind of therapy. I thought it would be good for me to work on an optimistic and colorful project during the first days of this crazy situation. Something that would cheer me up and hopefully would help to cheer other people up as well.
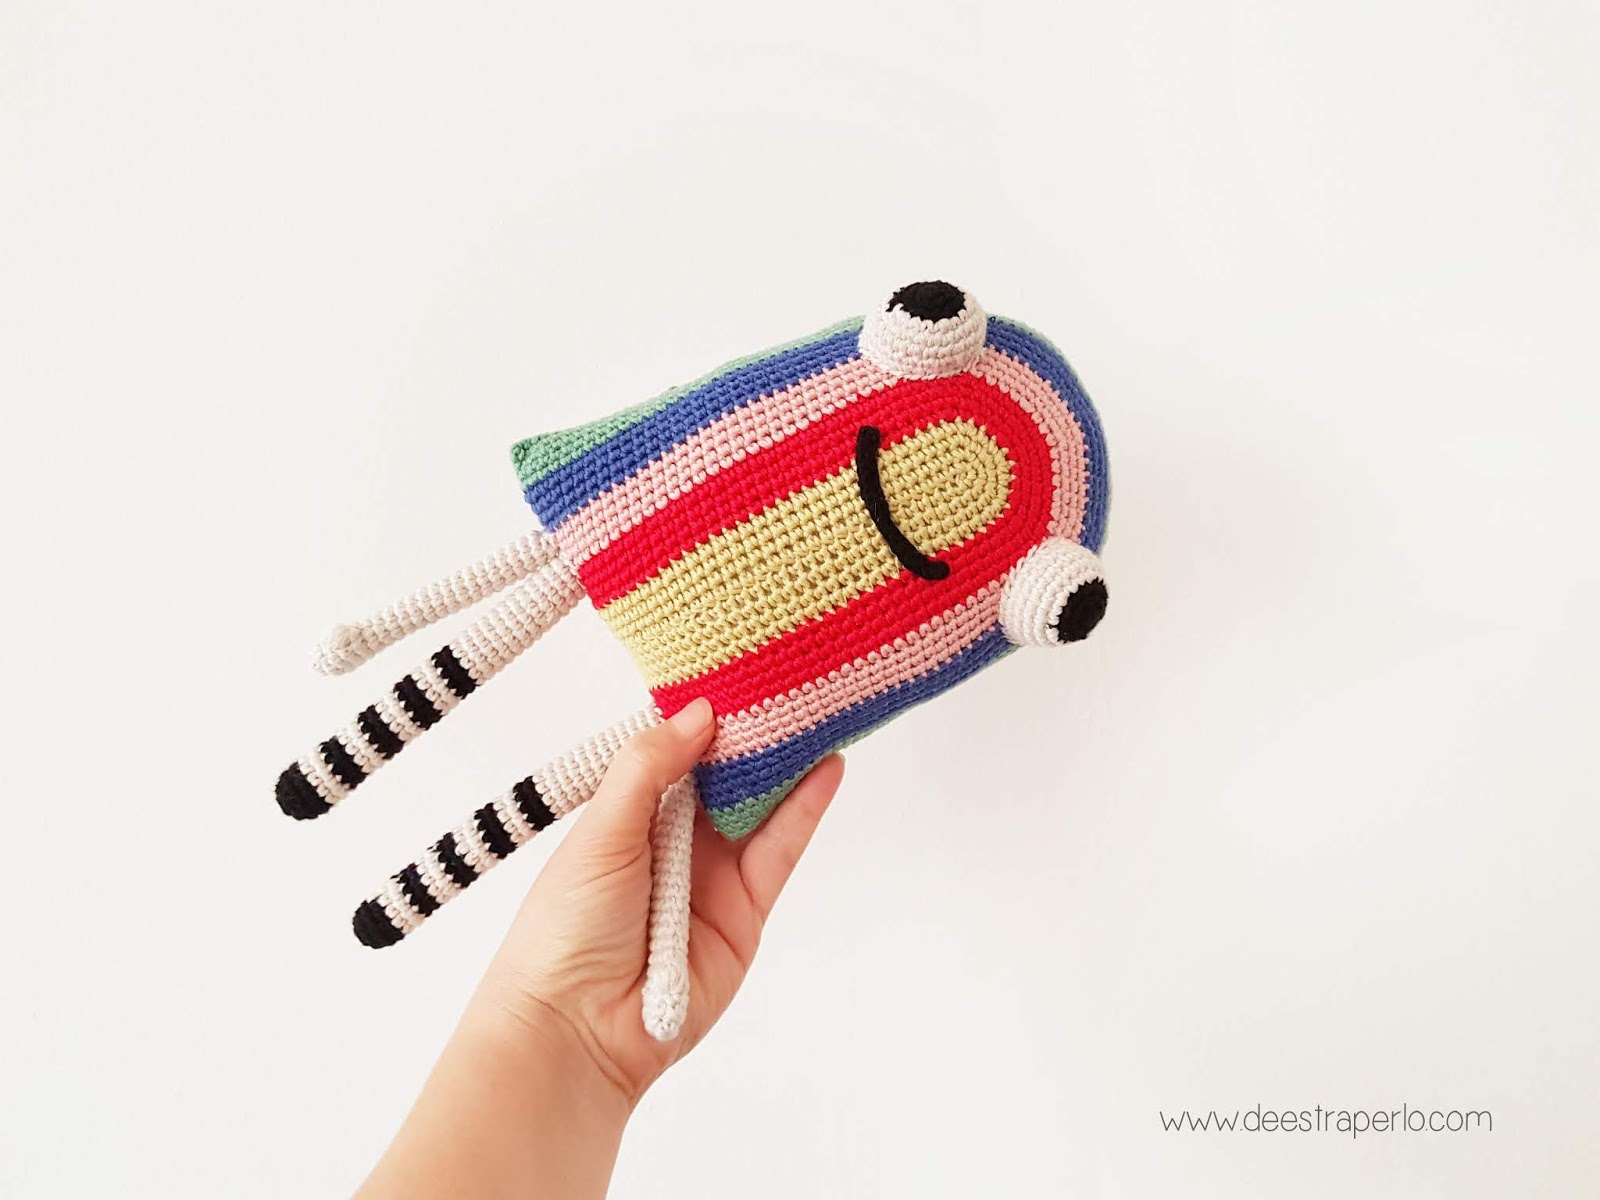
However, for a moment, it turned out to be the other way around. I wasn’t able to get the result I was looking for, I had to start it all over again like 15 times and I even had to leave the project on standby for a while. And then I understood that Willbe O’key is nothing but a metaphore of these times we’re living. The intention is good, positive, full of love. But the fact is that it’s not always easy to stay positive, and is inevitable to have our moods.
But, you know what? A few days later I got it and just the way I wanted it. It was unusually difficult, it had never happened to me before, but as a result of this we have an easy peasy amigurumi and quite quick to crochet, that I wish it will cheer your day up a little bit.
Todo empezó casi como una terapia, pensé que me vendría bien en esos primeros días de locura, centrarme en un muñeco alegre, con mensaje optimista, que me animase y ayudase a animarse a otras personas.
Sin embargo por un momento se convirtió casi en todo o contrario. No conseguía el resultado que quería, tuve que repetirlo por lo menos 15 veces y hasta dejarlo aparcado por días ya que me estaba generando más ansiedad que alivio. Y es que Willbe O’key no es ni más ni menos que una metáfora de esta situación. La intención es alegre, positiva, llena de amor. La realidad es que no siempre se consigue y hay momentos malos por los que es inevitable pasar.
Pero, ¿sabéis qué? Que al final lo conseguí, y me quedó justo como quería. Fue extraordinariamente complicado sacarlo, nunca me había ocurrido esto con un amigurumi, pero el resultado es un muñeco super sencillo y bastante rápido de realizar que, espero, alegrará un poco vuestro día.
DONWLOAD THE PDF HERE
DESCARGA AQUÍ EL PATRÓN EN PDF
MATERIALS
– Katia Fair Cotton in different colours. Pistachio 34, red 4, light pink 13, night blue 24, mint green 17, pearl light grey 11, black 2.
– 2mm crochet hook
– Stitch markers
– Tapestry needle and pins
– Pollyfill stuffing
– Pipecleaners
MATERIALES
– Katia Fair Cotton en los colores pistacho 34, rojo 4, rosa claro 13, azul noche 24, verde menta 17, gris claro perlado 11, negro 2.
– Aguja de ganchillo de 2 mm
– Marcadores
– Aguja lanera y alfileres
– Relleno
– Limpiapipas
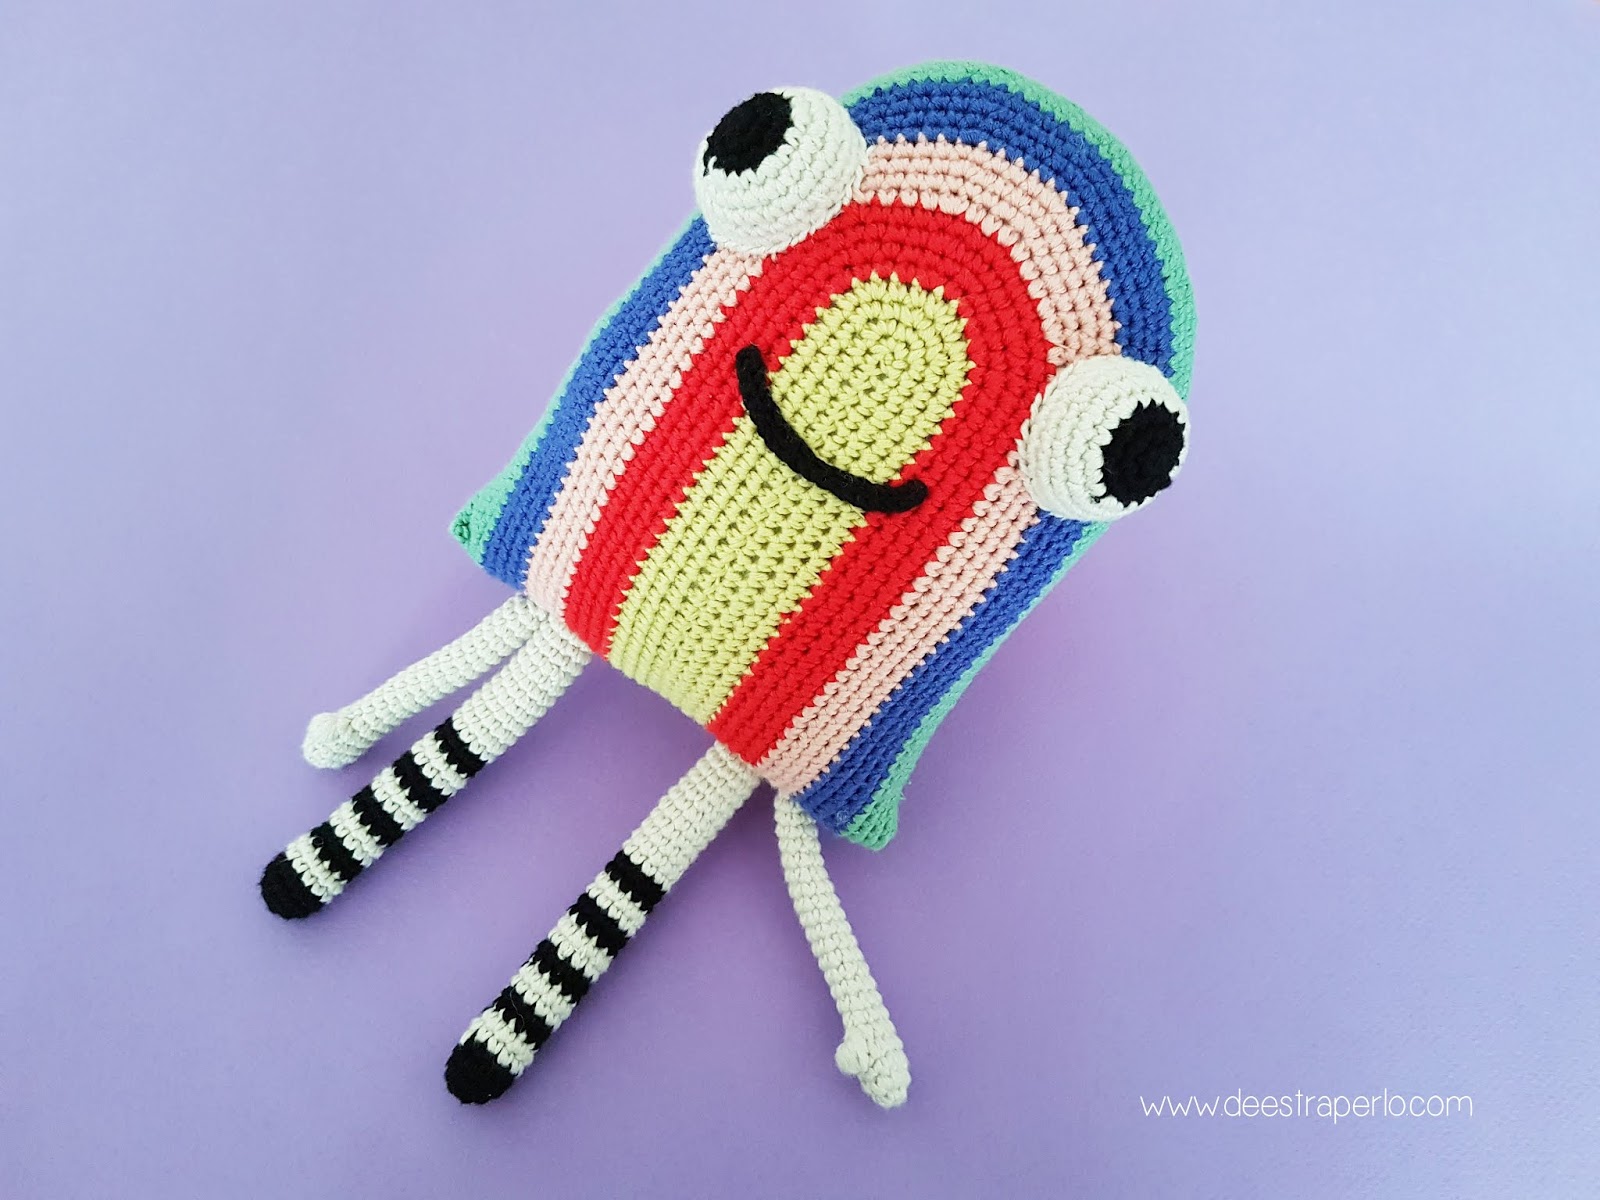
BODY
Willbe’s body is a very long oval folded.
How to crochet an oval?
We start crocheting the foundation round.
1. Using yellow cotton yarn, chain 63.
2. 61 sc (place a marker in the first sc), 3 sc in the last chain. (Place a marker in the first and third sc)
Keep crocheting along the other side of the chain, 60 sc, 2 sc where the first marker is and place a marker in the first of this last 2 sc you’ve just made.
Now your base is divided into 4 sections, two sections of 60 sc that will remain unalterable round after round, and 2 sections of 3 sc that you’ll increase proportionally in each round.
Therefore, where you now have 3 sc in the next round you’ll have 6, in the next 9, 12, 15… and so on.
Remember how the proportional increasing works.
¿Cómo tejer un óvalo?
Empezamos tejiendo la base:
1. Con amarillo, 63 cadenetas.
2. 61 pb (poner un marcador en el primer pb), 3 pb en la última cad. (Poner un marcador en el primer y tercer pb)
Seguir tejiendo por el otro lado de la cad, 60 pb, 2 pb donde está el primer marcador, poner un marcador en el primero de estos 2 pb.
Ahora mismo la base está dividida en 4 secciones, dos de 60 pb que se mantendrán inalterables vuelta tras vuelta y dos de 3 pb que irán aumentando proporcionalmente 3 pb en cada vuelta.
Por lo tanto, donde ahora hay 3 pb en la siguiente habrá 6, en la siguiente 9, 12, 15, y así sucesivamente.
Recordemos cómo funciona el aumento proporcional.
CUERPO
El cuerpo de Willbe es ni más ni menos que un óvalo muy alargado doblado por la mitad.
¿Cómo tejer un óvalo?
Empezamos tejiendo la base:
1. Con amarillo, 63 cadenetas.
2. 61 pb (poner un marcador en el primer pb), 3 pb en la última cad. (Poner un marcador en el primer y tercer pb)
Seguir tejiendo por el otro lado de la cad, 60 pb, 2 pb donde está el primer marcador, poner un marcador en el primero de estos 2 pb.
Ahora mismo la base está dividida en 4 secciones, dos de 60 pb que se mantendrán inalterables vuelta tras vuelta y dos de 3pb que irán aumentando proporcionalmente 3 pb en cada vuelta.
Por lo tanto, donde ahora tienes 3 pb en la siguiente tendrás 6, en la siguiente 9, 12, 15, y así sucesivamente.
Recordemos cómo funciona el aumento proporcional.
This is how you should work the sections between markers:
1. 3 sc in the same stitch
2. 3 inc ( 6 sc)
3. (1 sc, 1 inc) x3 = 9 sc
4. (2 sc, 1 inc) x3 = 12 sc
5. (3 sc, 1 inc) x3 = 15 sc
6. (4 sc, 1 inc) x3 = 18 sc…
Keep increasing until you reach the desired size. (You can redistribute the increasings in order to avoid the «corner effect»)
Así quedarán las secciones entre marcadores:
1. 3 pb en el mismo pb
2. 3 aum (6 pb)
3. (1 pb, 1 aum) x3 = 9 pb
4. (2 pb, 1 aum) x3 = 12 pb
5. (3 pb, 1 aum) x3 = 15 pb
6. (4 pb, 1 aum) x3 = 18 pb…
Y así hasta alcanzar el tamaño deseado. (Se pueden distribuir los aumentos para evitar el efecto esquina.)
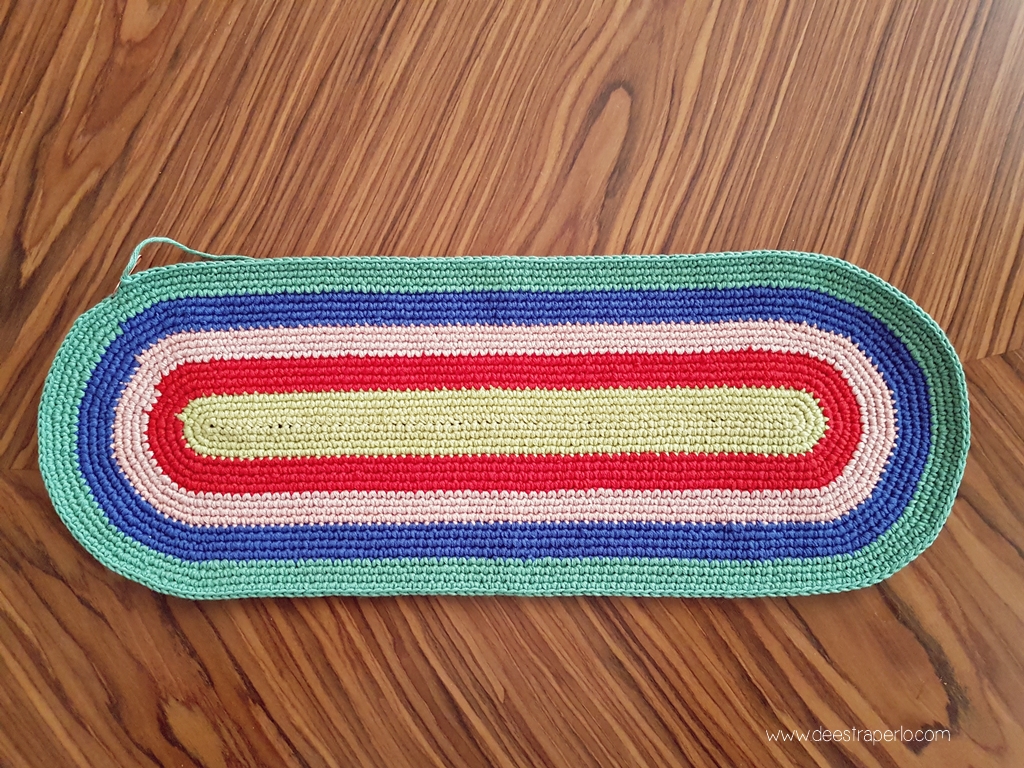
In this case we’ll crochet 20 rounds, changing the colour every 4 rounds in this order: yellow, red, pink, blue, green. (I’ve used another marker to know when to change the colour)
Use as many colours and crochet as many rounds as you like.
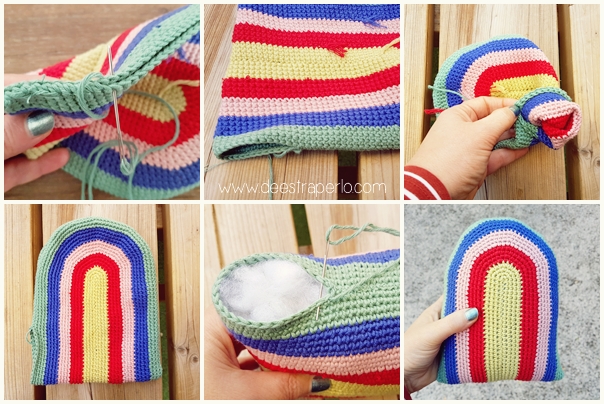
Once you’ve finished your oval, fold it as if it were a taco, but inside out, and start sewing the edges leaving 5 or 6 cm open. Stuff it and finish sewing it.
En este caso llegaremos a las 20 vueltas, cambiando de color cada 4 en este orden: amarillo, rojo, rosa, azul, verde. (Yo también he usado otro marcador para saber cuándo cambiar de color)
Usar tantos colores y hacer tantas vueltas como se quiera.
Una vez terminado el óvalo, doblar por la mitad, como si se tratase de un taco, pero con la parte del derecho hacia dentro.
Coser por el lateral hasta dejar unos 5 o 6 cm y dar la vuelta a la pieza, de dentro hacia afuera.
Rellenar y terminar de coser.
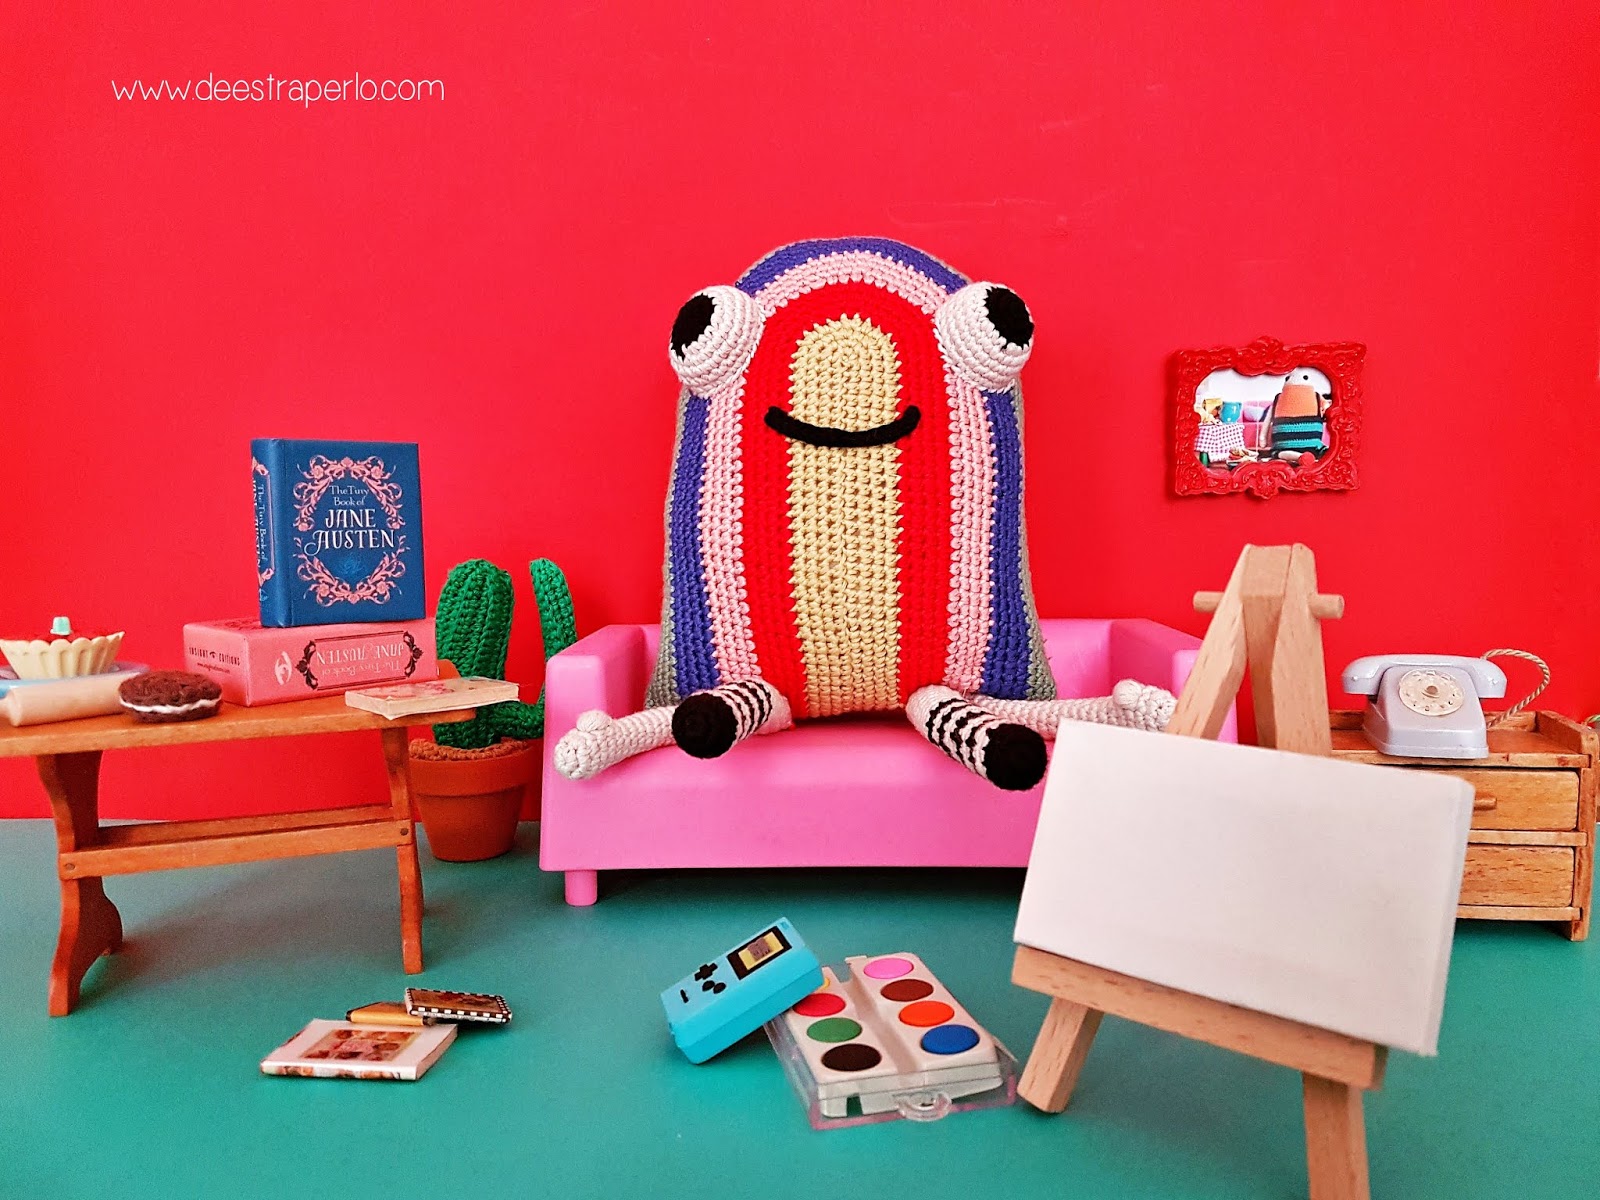
IDEA! TRY CROCHETING THE BODY WITH A BULKY YARN AND YOU’LL HAVE A NICE PILLOW TO DECORATE YOUR SOFA OR YOUR BED.EYES
1. Using black cotton yarn, 6 sc
2. 6 inc (12 sc)
3. (1 sc, 1 inc) x6 = 18 sc
4. Using white cotton yarn, (2 sc, 1 inc) x6 = 24 sc
5 to 8. 24 sc
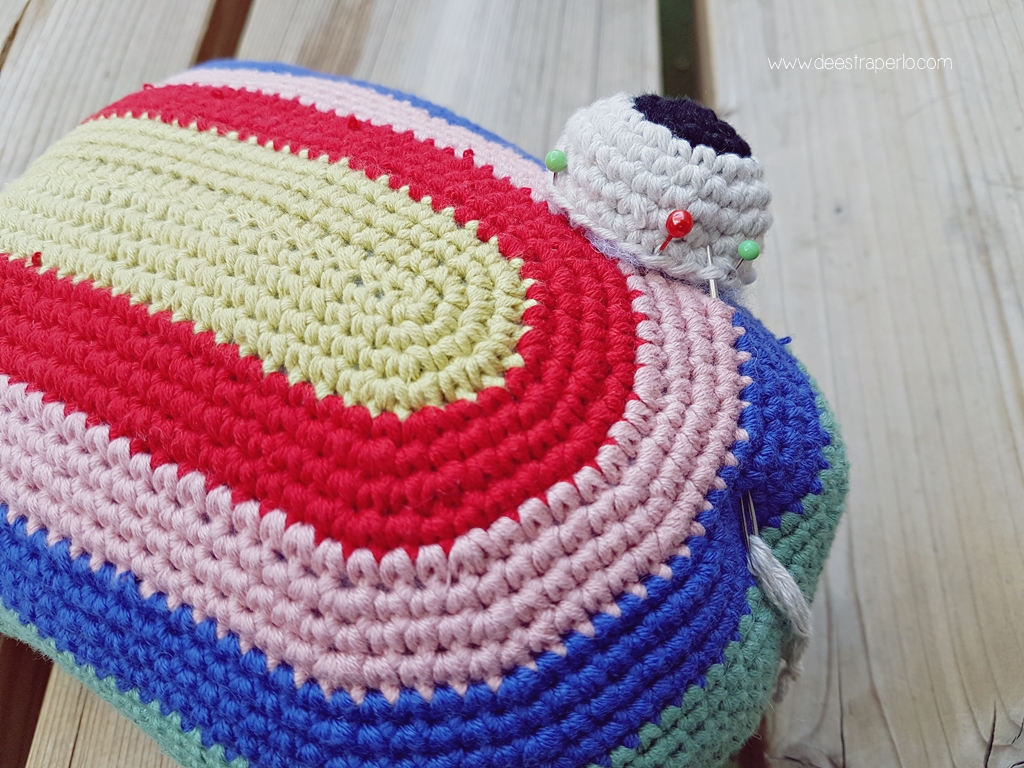
Stuff the eyes and attach them to the face.
¡IDEA! TEJE ESTE MISMO CUERPO CON UNOS HILOS Y AGUJA MÁS GORDOS Y TENDRÁS UN COJÍN IDEAL PARA DECORAR TU SOFÁ O TU CAMA.
1. Con negro, 6 pb
2. 6 aum (12 pb)
3. (1 pb, 1 aum) x6 = 18 pb
4. Con blanco, (2 pb, 1 aum) x6 = 24 pb
5 a 8. 24 pb
Rellenar los ojos y coser a la cara.
LEGS
1. Using black cotton yarn, 6 sc
2. 6 inc (12 sc)
3 and 4. 12 sc
5 to 32. 12 sc. Alternate white and black every 2 rounds. Crochet only with white from round 20 to the end. (12 rounds from the last black round)
Stuff the legs and attach them to the base of the body.
PIERNAS
1. Con negro, 6 pb
2. 6 aum (12 pb)
3 y 4. 12 pb
5 a 32. 12 pb. Alternar el blanco y el negro cada dos vtas. Tejer todo en blanco desde la vta 20 hasta el final. (12 vtas después de la última negra)
Rellenar las piernas y coser a la base del cuerpo.
ARMS
1. Using white cotton yarn, 5 sc
2. 5 inc (10 sc)
3 and 4. 10 sc
5. 1 puff stitch, 9 sc
6. 10 sc
7. 1 dec, 8 sc (9 sc)
8 to 22. 9 sc
If you are using pipe cleaners, insert them now.
Attach them to the base of the body, next to the legs.
BRAZOS
1. Con blanco, 5 pb
2. 5 aum (10 pb)
3 y 4. 10 pb
5. 1 punto de avellana, 9 pb
6. 10 pb
7. 1 dism, 8 pb (9 pb)
8 a 22. 9 pb
Si se usan limpiapipas, es el momento de introducirlos en los brazos.
Coser en la base del cuerpo, junto a las piernas.
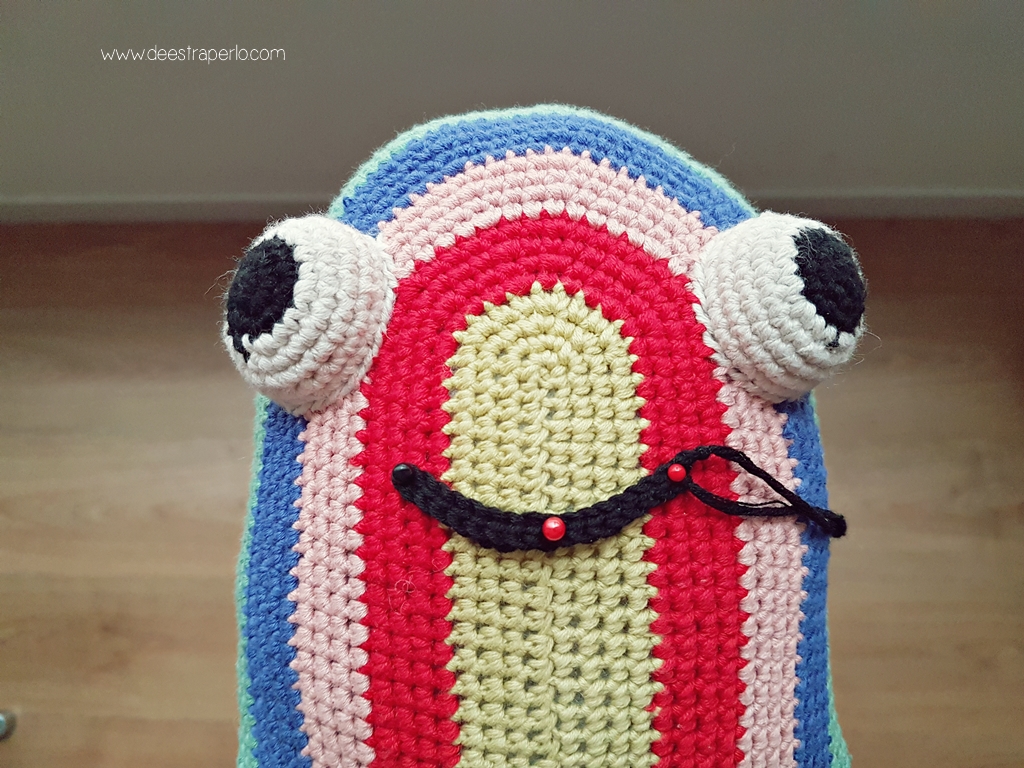
SMILE
1. Using black cotton yarn, chain 18
2. 17 sl st
Attach the smile onto the face
SONRISA
1. Con negro, 18 cad
2. 17 pr
Coser la sonrisa a la cara.
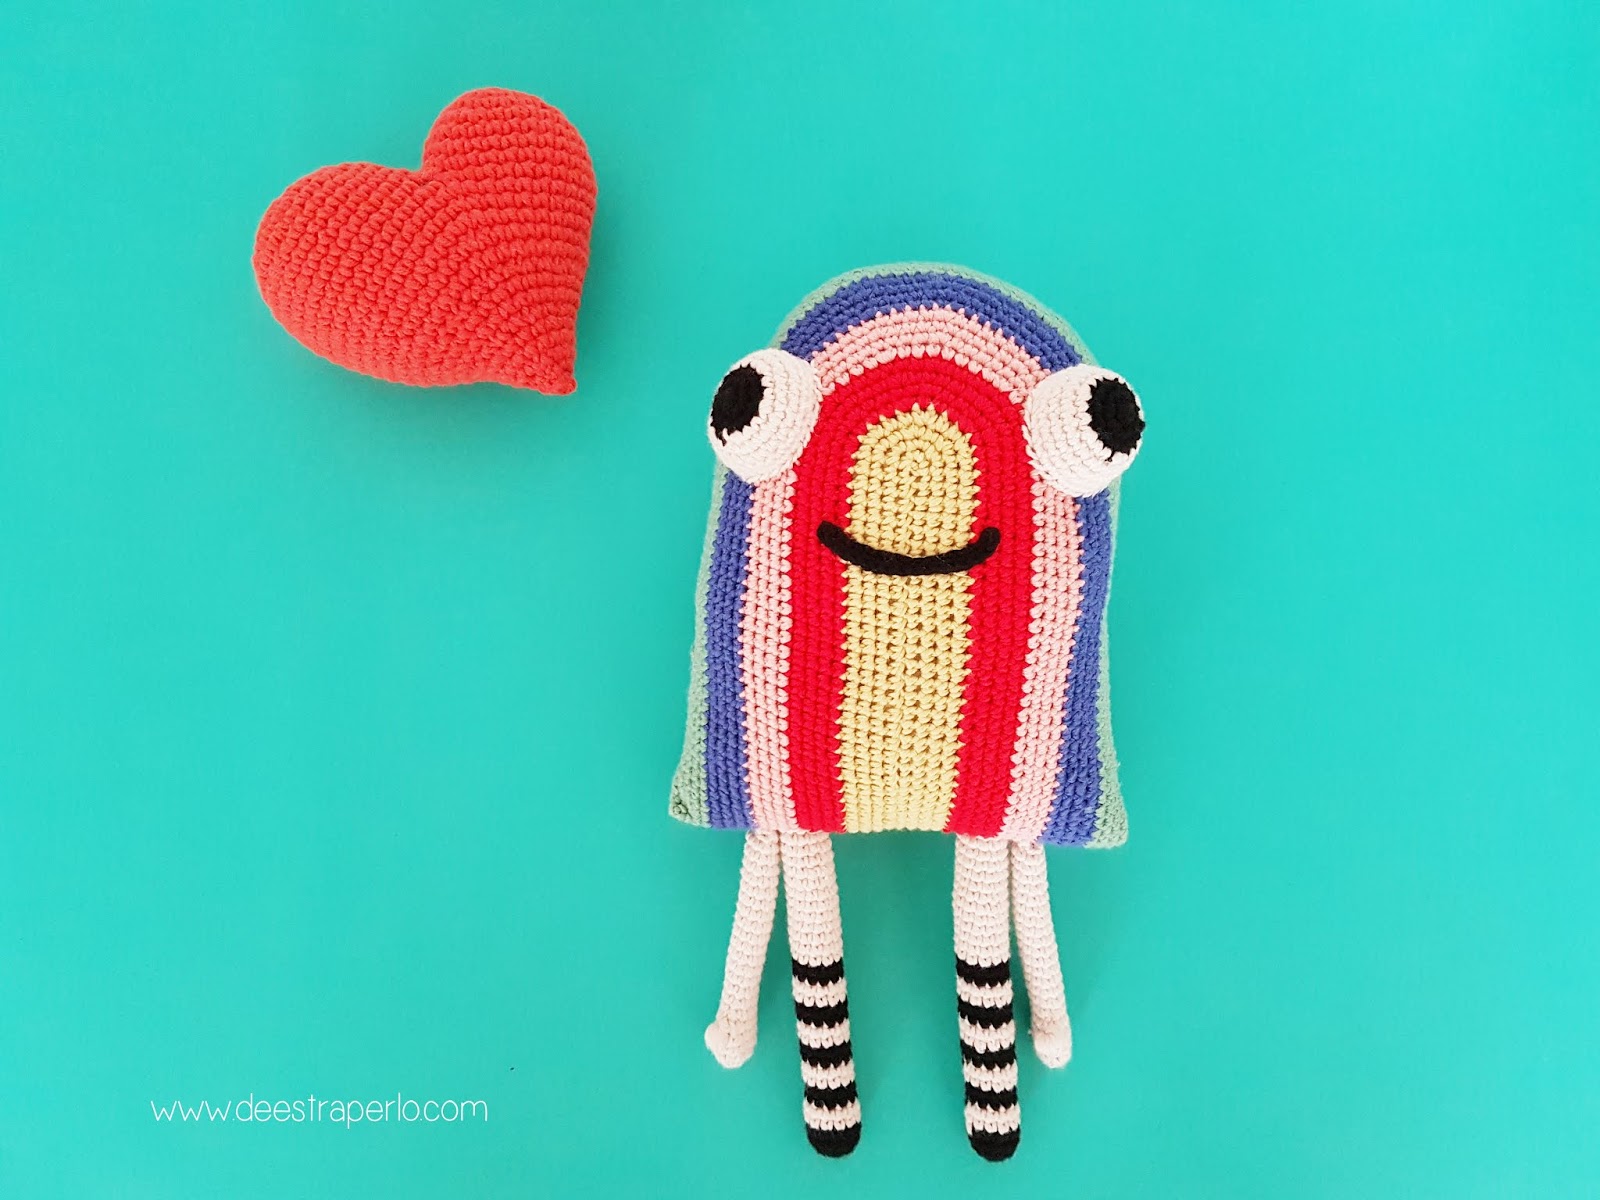
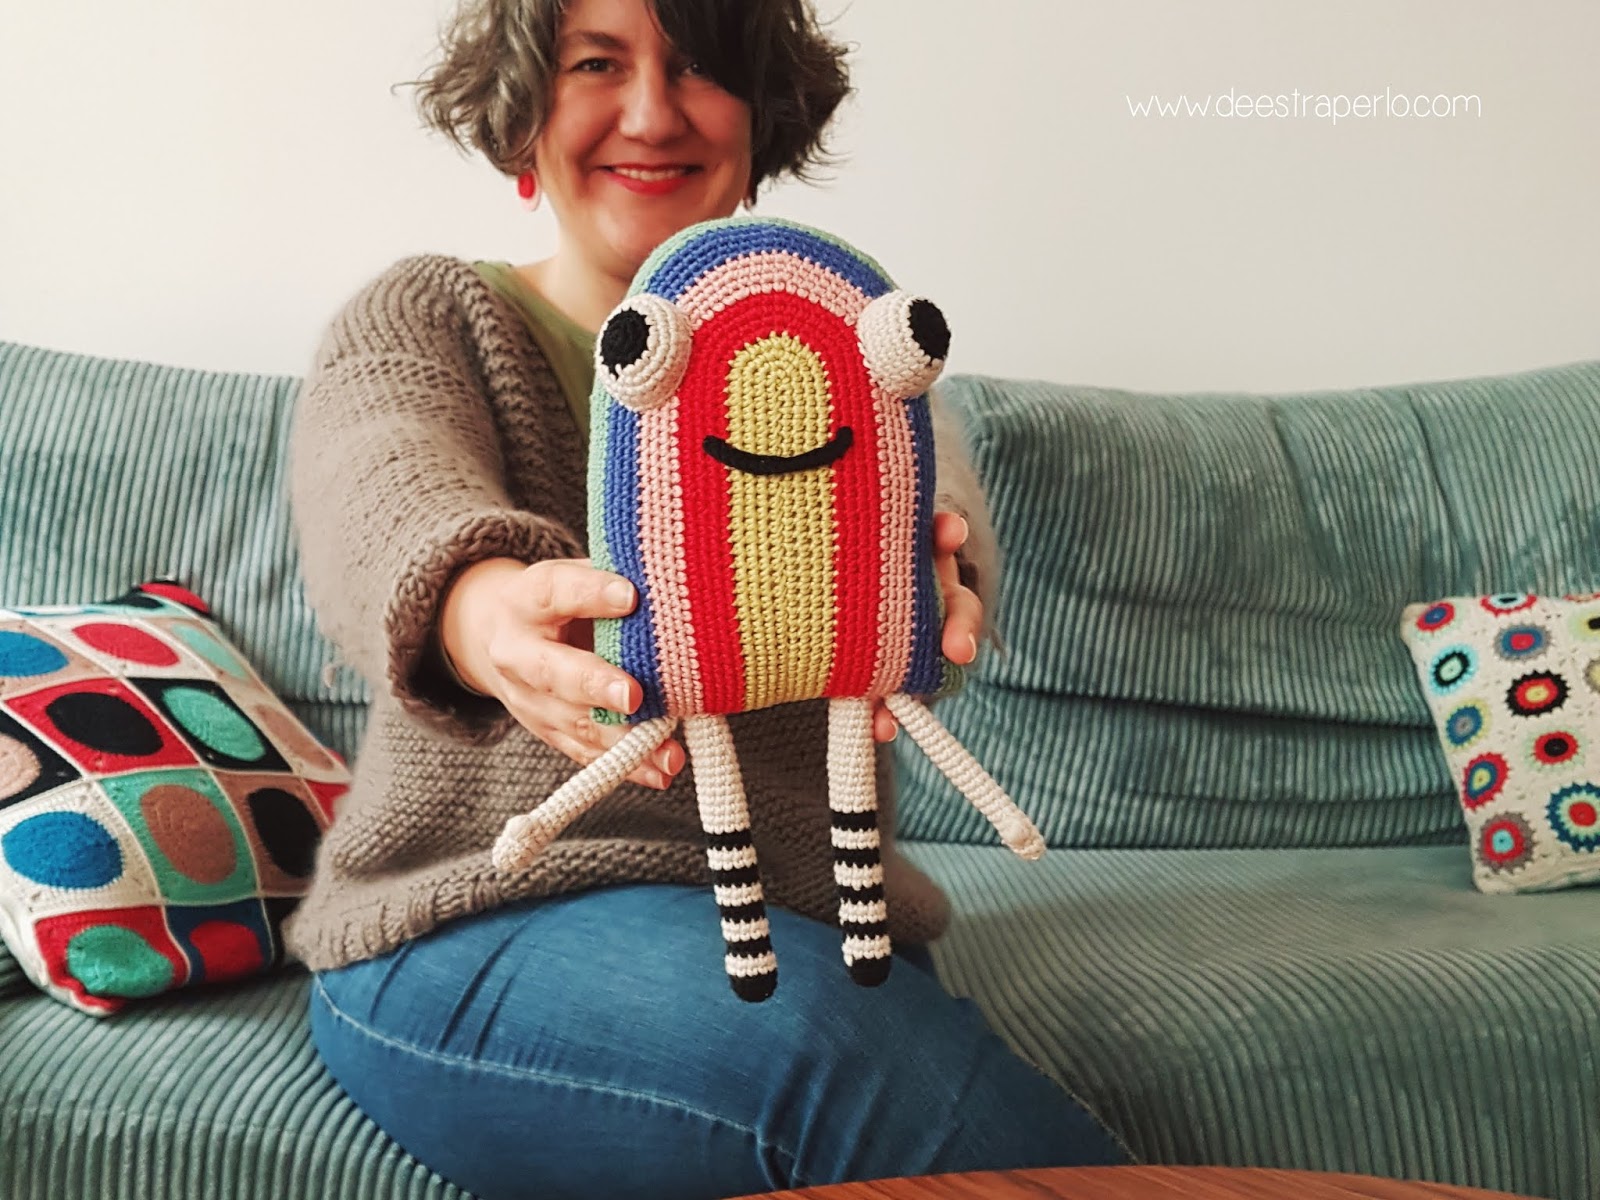
STAY AT HOME WITH WILLBE. You can hug him when you’re feeling down. Just look at his cute face and try to imitate his smile.
QUÉDATE EN CASA, CON WILLBE. Abrazadlo si os sentís mal. Mirad su carita y dejad que sea su sonrisa la que os contagie.