
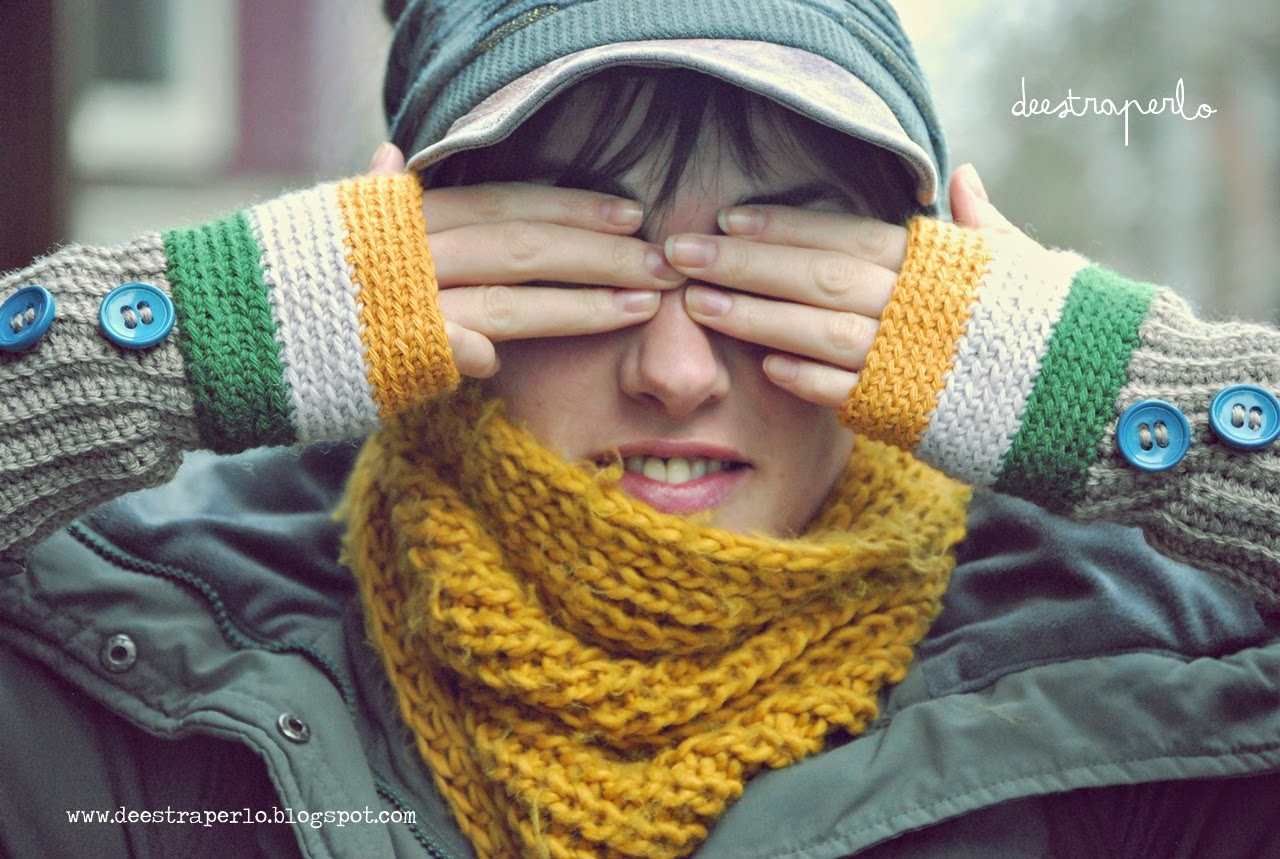
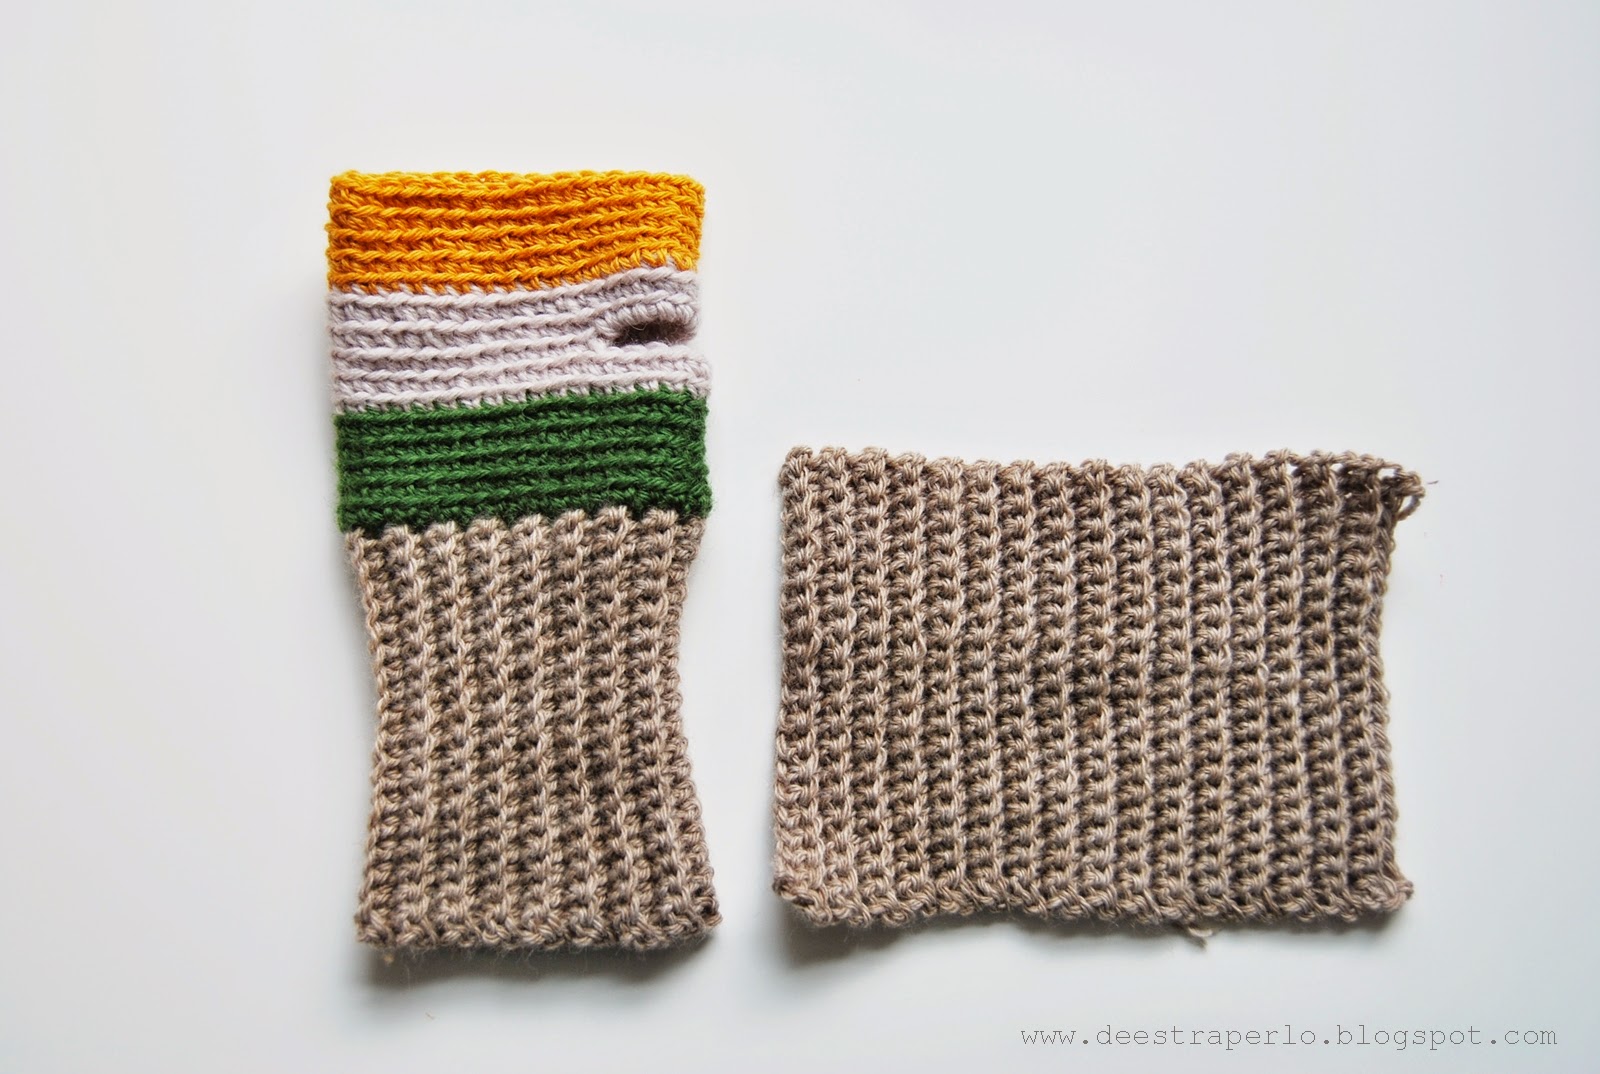
Before the cold is over I would like to show to you how to crochet this «very quick and easy crochet fingerless gloves«. Two pieces, the cuffing and the glove, both in single crochet only in back loops, but with a very different effect since one is crocheted in rows and the other one in the round.
Antes de que se acabe el invierno quiero enseñaros a hacer estos mitones super fáciles y rápidos. Constan de dos partes, el puño y el guante. Ambas partes están tejidas con punto bajo por detrás de la lazada, pero como veréis los resultados son totalmente diferentes, ya que uno está tejido en filas de ida y vuelta y otro en vueltas en espiral.
You’ll need: 4mm (G/6) crochet hook, yarn in colours brown A, green B, white C, ocher D, 6 buttons, scissors, stitch marker, tapestry needle.
Materiales necesarios: Ganchillo de 4 mm, lanas de colores marrón A, verde B, blanco C, ocre D, 6 botones, tijeras, marcador, aguja lanera.

Abbreviations:
BL In back loops
CH Chain
SC Single Crochet
SL ST Slip stitch
ST Stitch
Abreviaciones:
BL Por detrás de la lazada
Cad Cadeneta
PB Punto bajo
PR Punto raso
PT Punto
VTA Vuelta
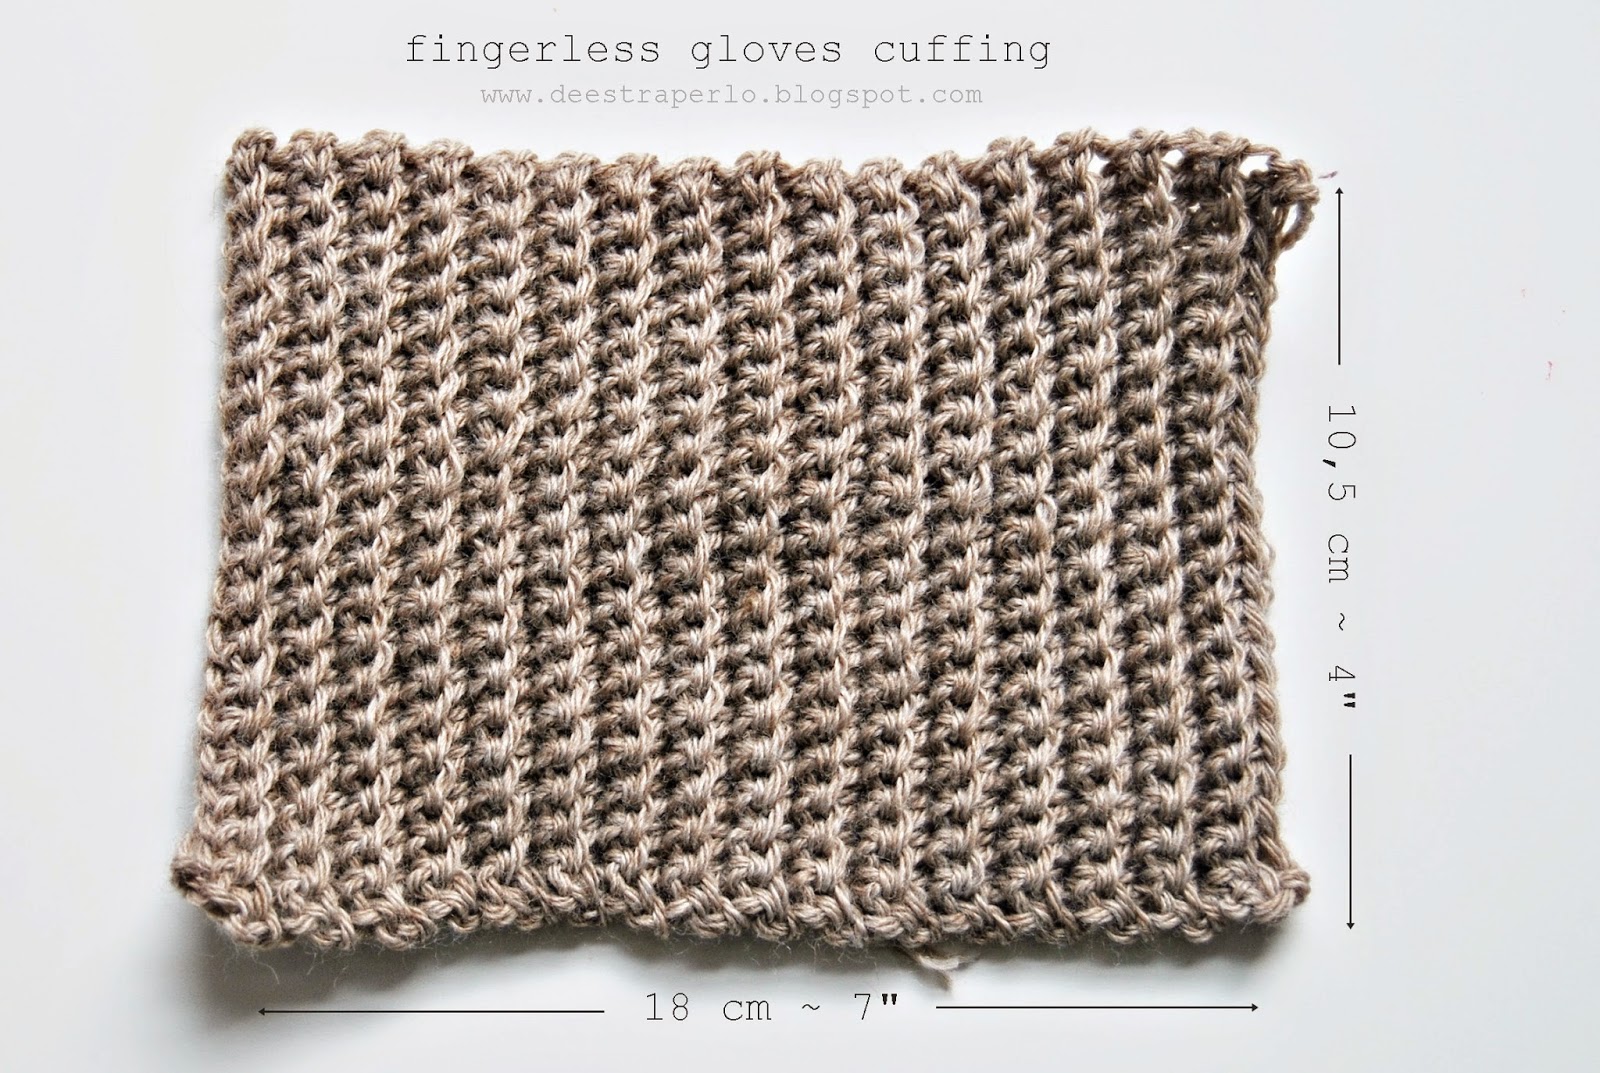
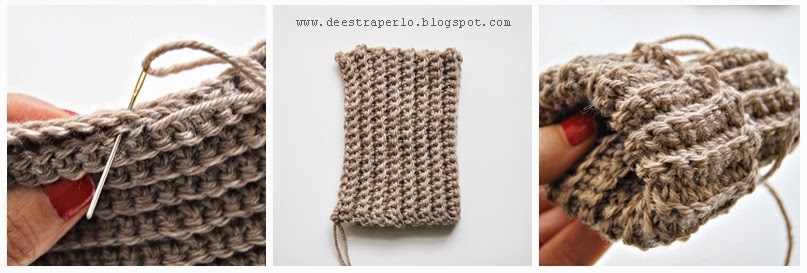
The cuffing is a 18cm x 10,5cm (7″x 4″) piece in ribbing stitch.
Foundation row: Chain 21
Row 1: 20 single crochet (sc)
Roows 2 to 32: Chain 1, 20 sc only in back loops (BL)
Fasten off.
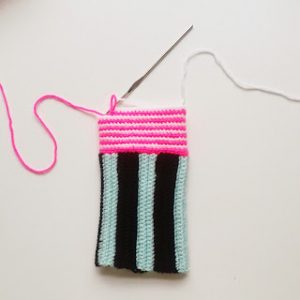
Once you’ve finished your piece, join the first and the last row with the tapestry needle forming a cylinder, and turn it over.
El puño es una pieza de punto elástico de 18cm x 10,5cm aproximadamente, tejida en punto elástico.
Cadeneta base: 21 cadenetas
Fila 1: 20 puntos bajos (pb)
Filas 2 a 32: 1 cadeneta, 20 pb tejidos por detrás de la lazada. (BL)
Corta el color B.
Una vez terminada nuestra pieza unimos la primera y la última fila con la aguja lanera formando un cilindro y le damos la vuelta.
The cuffing is done, let’s start the glove:
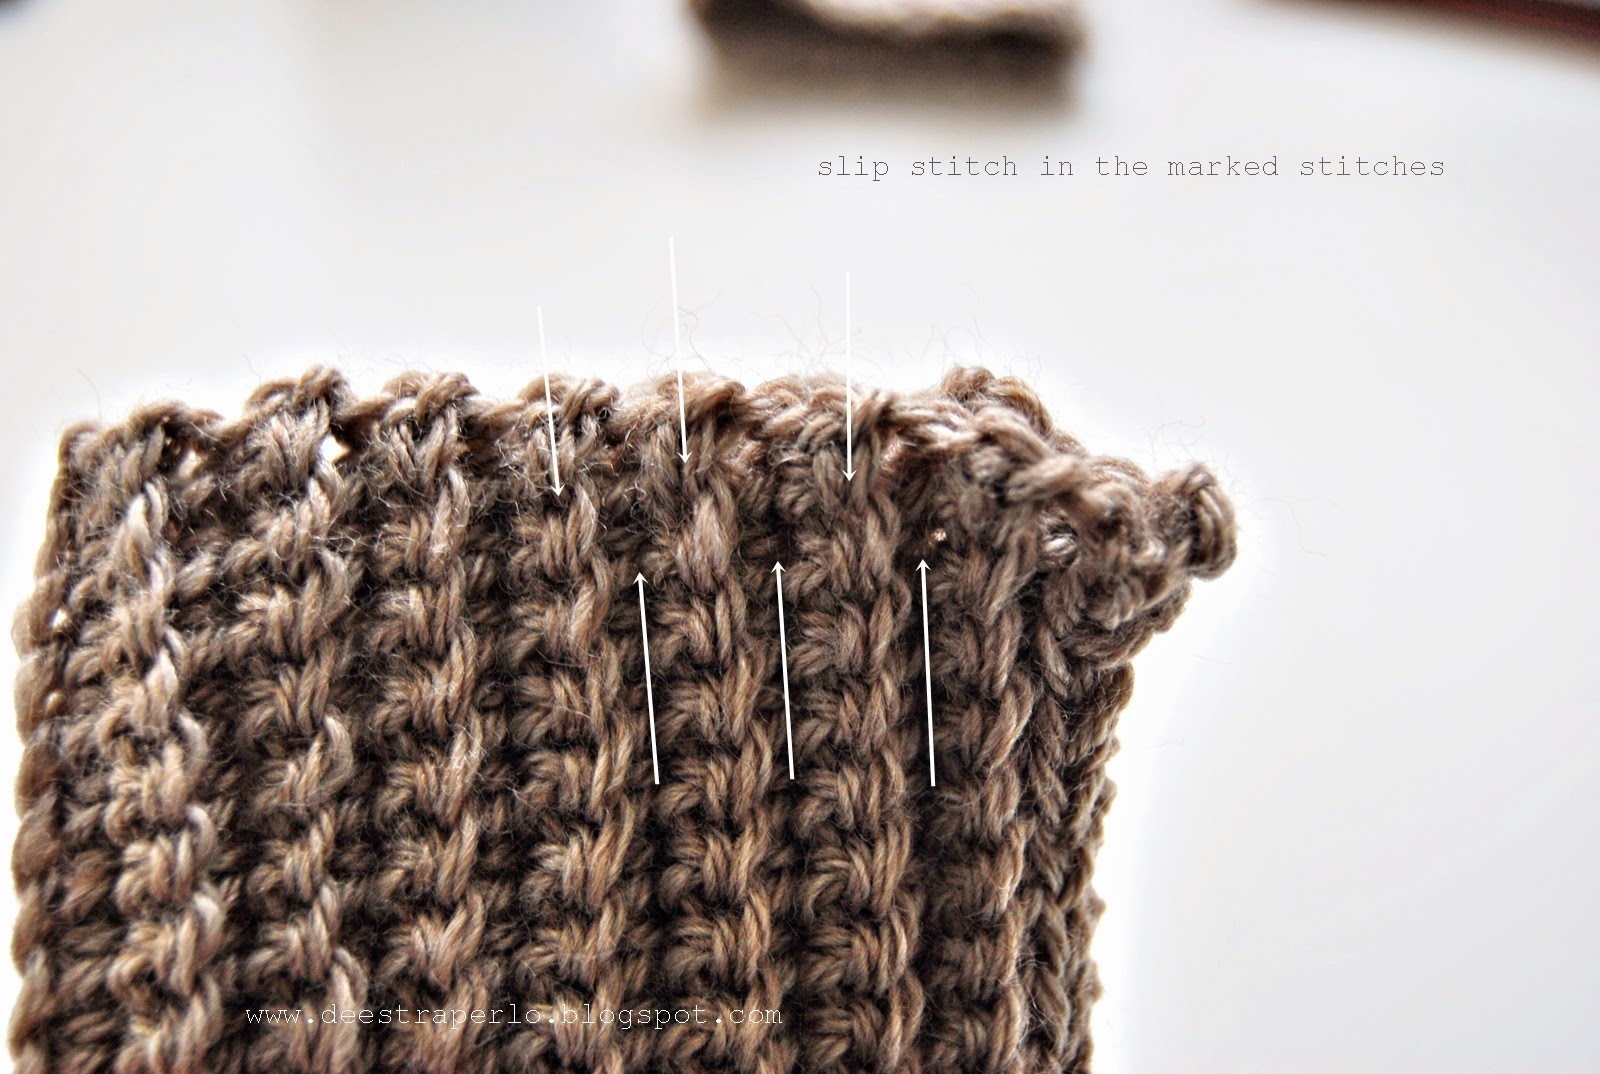
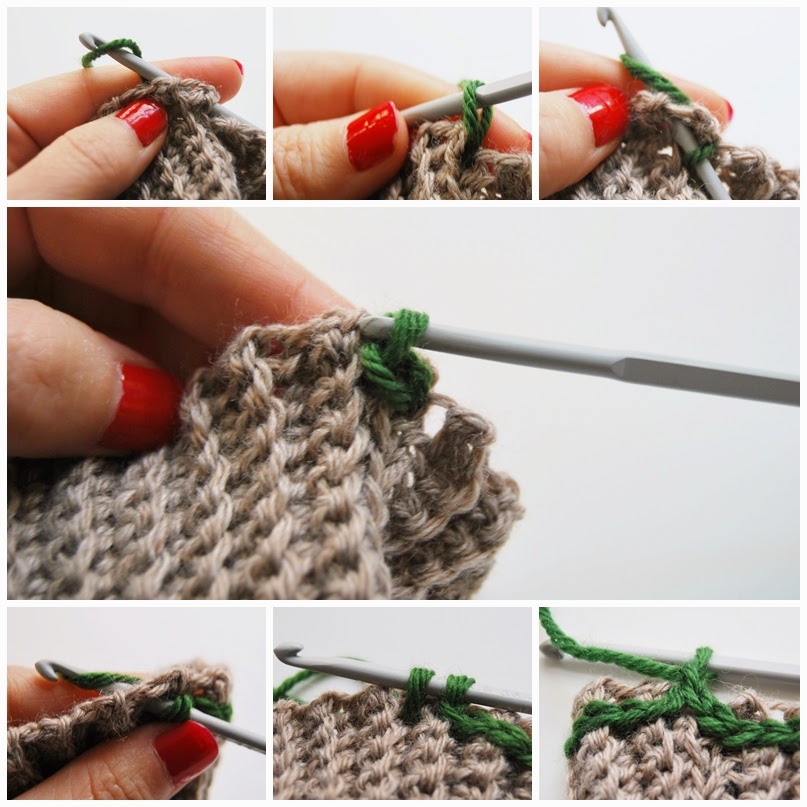
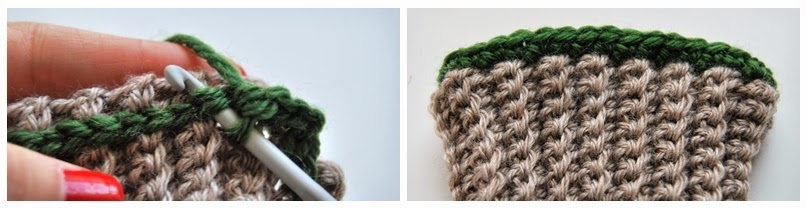
Joining round: First of all we’re going to crochet a slip stitch round in one of the cylinder edges, in order to get a neat division between both parts. Join color B and make slip stitches (sl st) all around the cuffing end, one sl st per cuffing row. As you have 32 cuffing rows you must have 32 sl st, but you’ll have to add 2 more because the piece grows a little when sewing the two edges to form the cylinder. So you should have 34 sl st at the end of the round. Join the first sl st with the first sl st with a sl st a,d chain 1. Using a stitch marker will help you counting rounds.
Round 1: (from now on work in spiral) Sc in each sl st (34 sc)
Rounds 2 to 5: sc in each stitch (st), in BL (34 sc)
Rounds 6 and 7: Join colour C, sc in each st, in BL (34 sc)
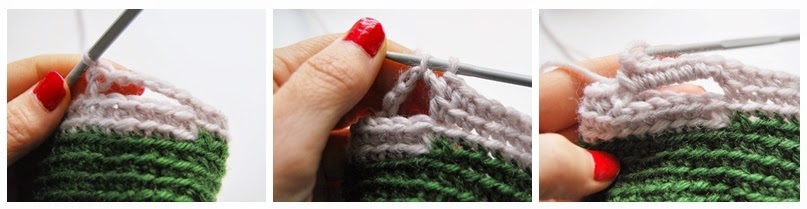
Round 8 (thumb hole): Chain 5, skip 7 sc, sc in the next sc and in every sc around, in BL.(5 chains and 27 sc)
Round 9: 7 sc over the 5 chains, sc in next sc and in every sc around, in BL. (34 sc)
Round 10: sc in each st, in BL (34 sc)
Rounds 11 to 15: Join colour D, sc in each st, in BL (34 sc)
El puño ya está, vamos con el guante:
Vuelta de unión: Primero vamos a tejer una fila de punto raso (pr) alrededor de uno de los extremos del cilindro para obtener una división bien pulcra. Une el color B y teje pr alrededor del puño, un pr por cada fila del puño. Como tienes 32 filas en el puño, deberías tener 32 pr, pero tendrás que añadir 2 más ya que la pieza crece un poco al coser los dos extremos para formar el cilindro, por lo que al final tendrás 34 pr. Une el primer y el último pr con otro pr y haz una cadeneta. Usar un marcador te ayudará a contar las filas.
Vuelta 1: ( a partir de ahora trabajaremos en espiral) Pb en cada pr (34pb)
Vtas. 2 a 5: pb en cada punto en BL (34pb)
Vtas. 6 y 7: Une el color C, pb en cada punto, en BL (34pb)
Vta. 8 (agujero para el pulgar): Haz 5 cadenetas, salta 7 pb, pb en el siguiente punto y en cada punto alrededor, en BL (5 cadenetas y 27 pb)
Vta. 9: 7pb sobre las 5 cadenetas, pb en el siguiente punto y en cada uno alrededor, en BL. (34pb)
Vta. 10: pb en cada punto, en BL. (34pb)
Vtas. 11 a 15: Une el color D, pb en cada punto, en BL (34pb)

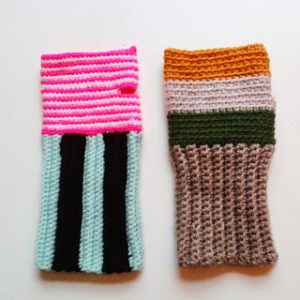
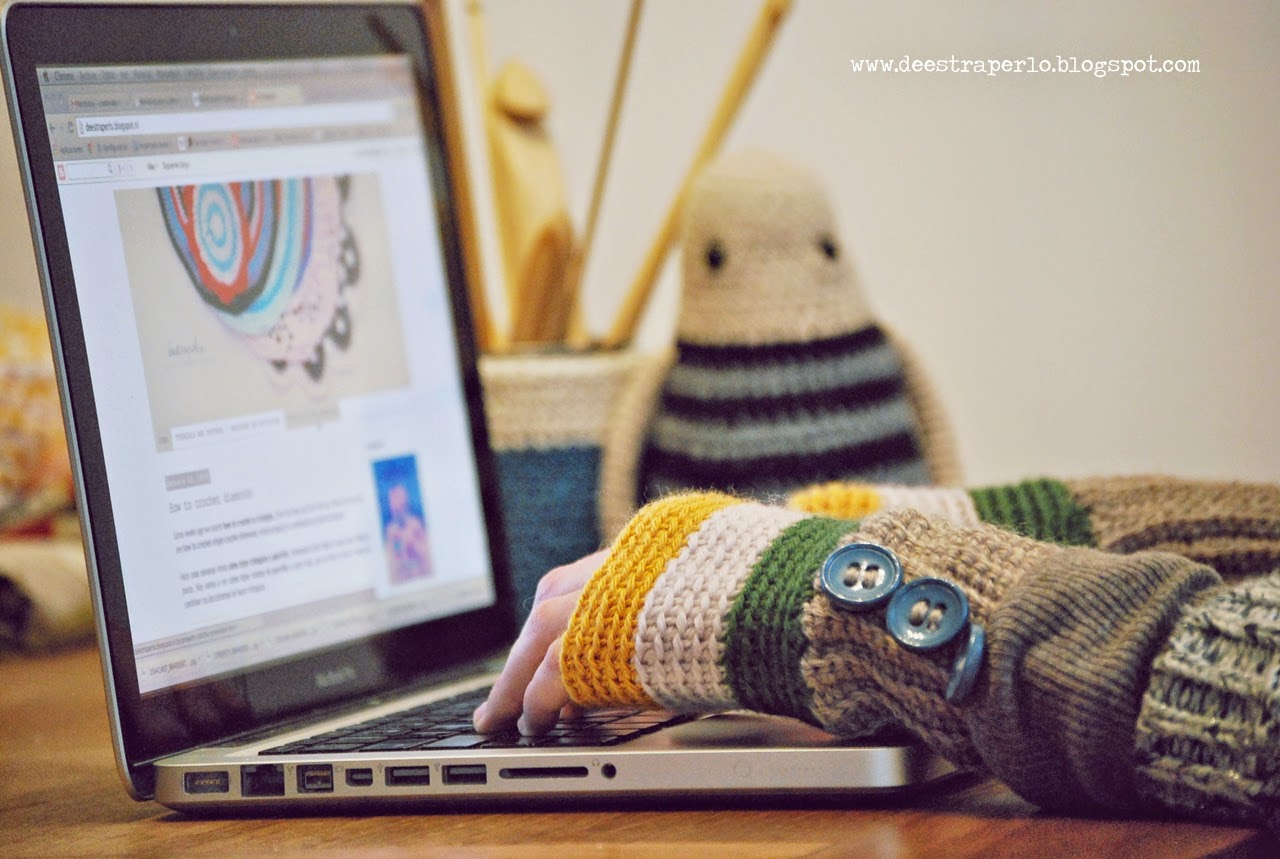
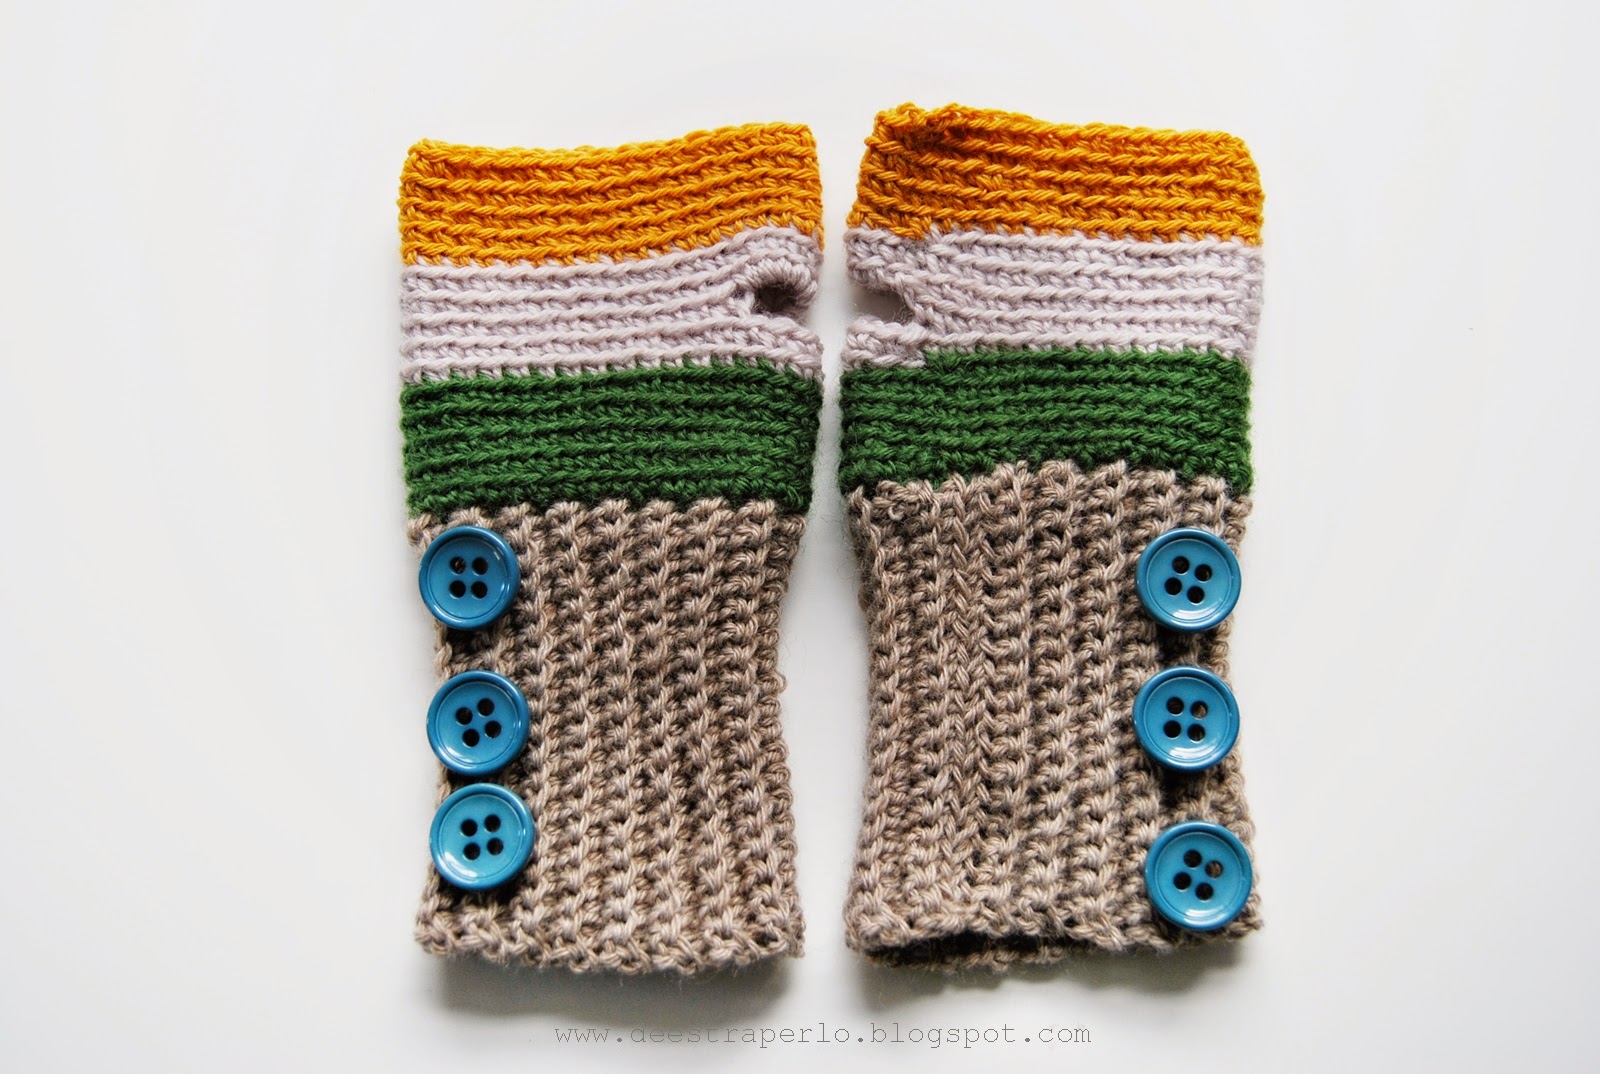
Make 2 and add the buttons in the opposite side of the thumb hole.
Haz dos piezas iguales y cose los botones, en el lado contrario del agujero para el pulgar.
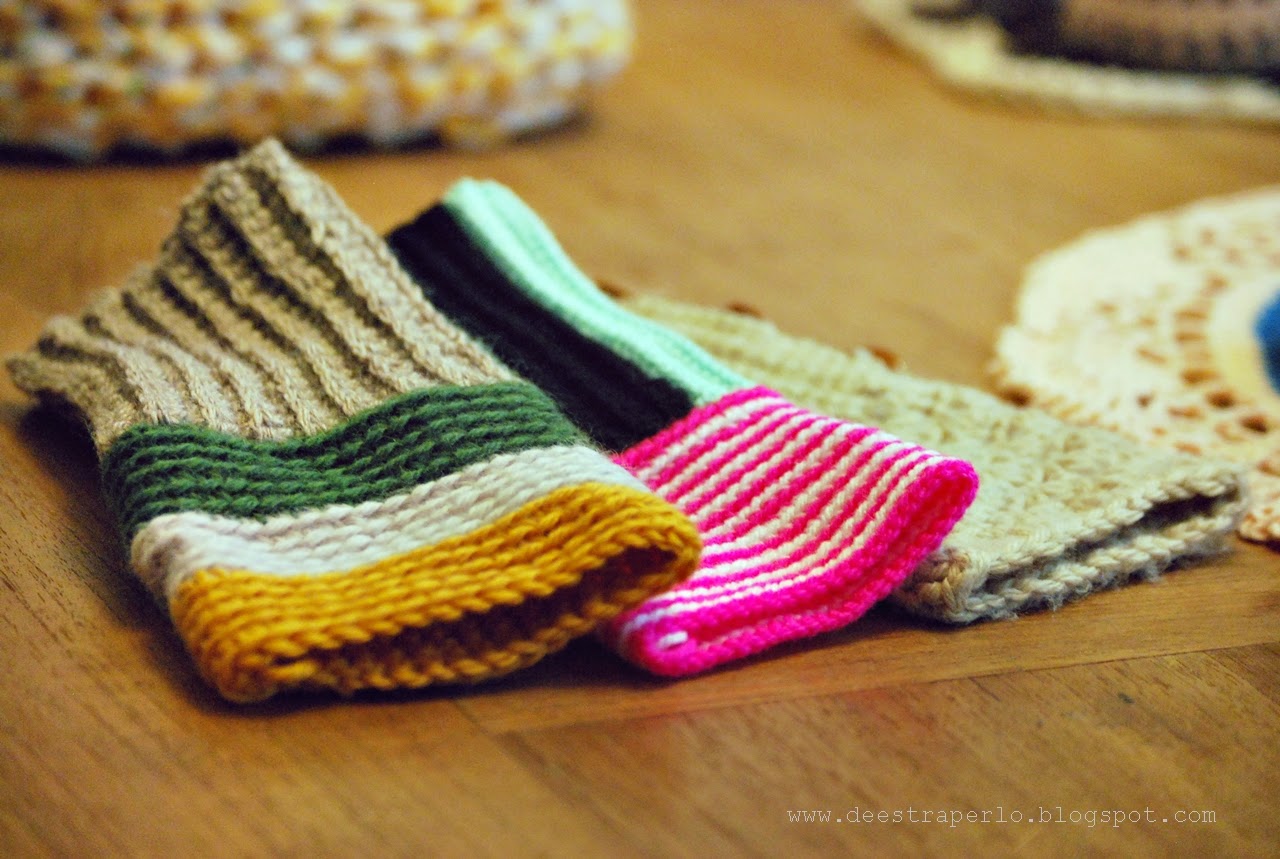
Try different hooks and yarns, and different colour combinations. There’re endless possibilites!!
Prueba distintos tamaños de aguja, distintos hilos y distintas combinaciones de color, las combinaciones son infinitas y podrás lucir guantes nuevos con cada modelito.
More pictures in instagram!